纹理映射
返回首页纹理映射

纹理坐标

加载的相关代码
    const vshader_source = `
            attribute vec4 a_position;
            attribute vec2 a_texcoord;
            varying vec2 v_texcoord;
            void main() {
                gl_position = a_position;
                gl_pointsize = 10.0;
                v_texcoord = a_texcoord;
            }
    `;
    const fshader_source = `
        // 指定精度,书上的例子会编译报错, 参考 https://stackoverflow.com/a/27067272
        precision mediump float;
        varying vec4 v_color;
        uniform sampler2d u_sampler;
        varying vec2 v_texcoord;
        void main() {
            gl_fragcolor = texture2d(u_sampler, v_texcoord);
        }
        `;

export function initvertexbuffersch5_3(gl: webglrenderingcontext) {
    // 同时保存顶点坐标纹理坐标,坐标的映射关系见上面的图
    const verticescoords = new float32array([
        -0.5, 0.5, 0.0, 1.0,
        -0.5, -0.5, 0.0, 0.0,
        0.5, 0.5, 1.0, 1.0,
        0.5, -0.5, 1.0, 0.0,
    ]);
    let n = 4;
    // step1 创建缓冲区对象
    const vertexbuffer = gl.createbuffer();
    const coordbuffer = gl.createbuffer();
    // step2 将缓冲区对象绑定到目标
    gl.bindbuffer(gl.array_buffer, vertexbuffer);
    gl.bindbuffer(gl.array_buffer, coordbuffer);
    //step3 向缓冲区写入数据
    gl.bufferdata(gl.array_buffer, verticescoords, gl.static_draw);
    //step4 将缓冲区分配给attribute变量,这个2指两个点是一个坐标
    const a_position = gl.getattriblocation(gl.program, 'a_position');
    const a_texcoord = gl.getattriblocation(gl.program, 'a_texcoord');
    const fsize = verticescoords.bytes_per_element;
    // 重点在这里!!!
    gl.vertexattribpointer(a_position, 2, gl.float, false, fsize * 4, 0);
    gl.vertexattribpointer(a_texcoord, 2, gl.float, false, fsize * 4, fsize * 2);
    // step5 开启attribute变量。
    gl.enablevertexattribarray(a_position);
    gl.enablevertexattribarray(a_texcoord);
    return n;
}
export function inittextures(gl: webglrenderingcontext, n: number) {
    // 创建纹理对象
    const texture = gl.createtexture()!;
    // 获取uniform存储位置
    const u_sampler = gl.getuniformlocation(gl.program, 'u_sampler')!;

    const image = new image();
    image.onload = () => {
        // 图像加载完成处理纹理
        loadtexture(gl, n, texture, u_sampler, image);
    };
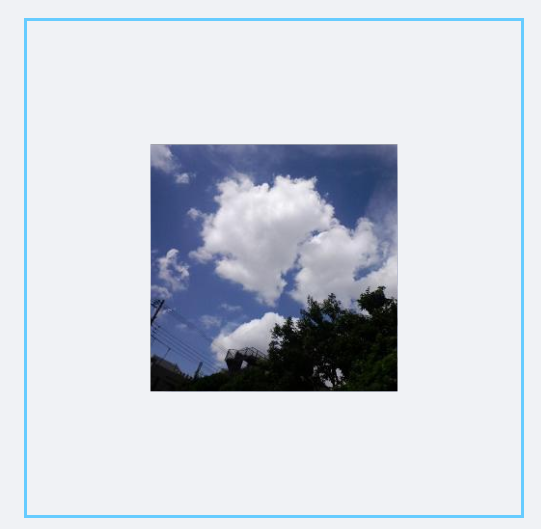
    image.src = '/images/sky.jpg';
}

function loadtexture(gl: webglrenderingcontext, n: number,
    texture: webgltexture, u_sampler: webgluniformlocation, image: htmlimageelement) {
    //对纹理图像y轴反转
    gl.pixelstorei(gl.unpack_flip_y_webgl, 1);
    // 开启0号纹理单元
    gl.activetexture(gl.texture0);
    // 向target绑定纹理对象
    gl.bindtexture(gl.texture_2d, texture);
    // 配置纹理参数
    gl.texparameteri(gl.texture_2d, gl.texture_min_filter, gl.linear);
    // 配置纹理图像
    gl.teximage2d(gl.texture_2d, 0, gl.rgb, gl.rgb, gl.unsigned_byte, image);
    // 将0号纹理传给着色器
    gl.uniform1i(u_sampler, 0);
}

    initshaders(gl, vshader_source, fshader_source);
    const n = initvertexbuffersch5_3(gl);
    inittextures(gl,n);

 // 清空canvas
    gl.clear(gl.color_buffer_bit);
    //绘制点
    gl.drawarrays(gl.triangle_strip, 0, n);

理解配置纹理参数 gl.texparameteri

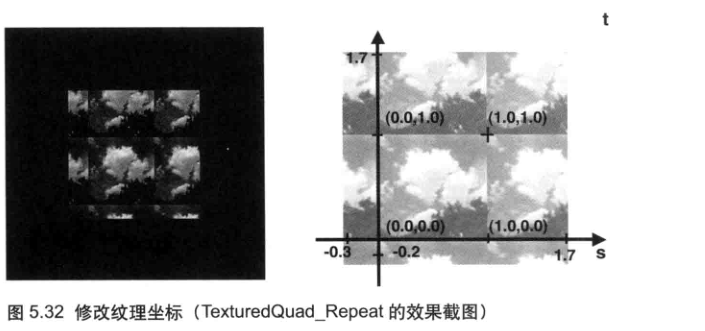
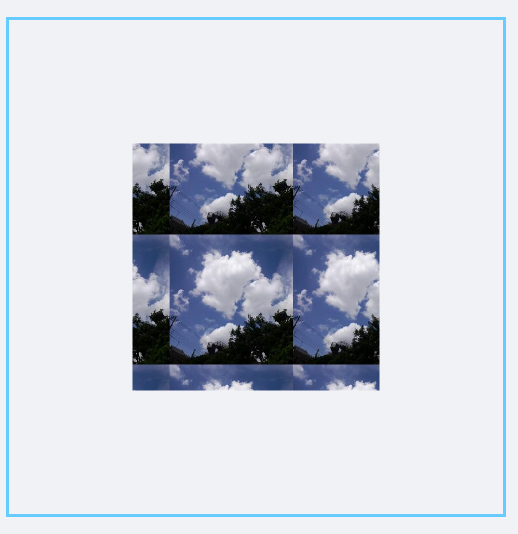
将纹理坐标进行修改
    const verticescoords = new float32array([
        -0.5, 0.5, -0.3, 1.7,
        -0.5, -0.5, -0.3, -0.2,
        0.5, 0.5, 1.7, 1.7,
        0.5, -0.5, 1.7, -0.2,
    ]);
由于纹理图像不足以覆盖整个矩形,所以你可以看到,在那些本该空白的区域,纹理又重复出现了。

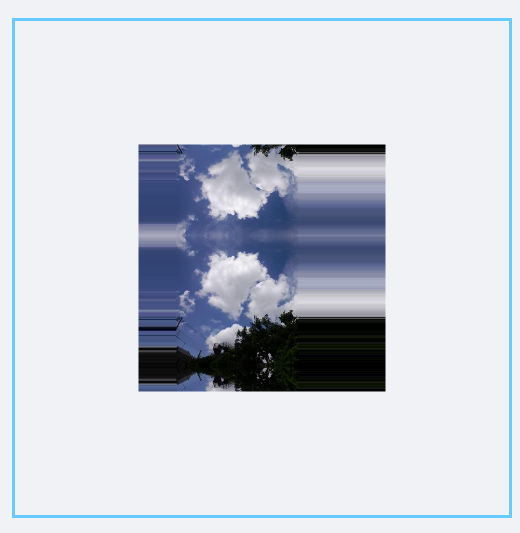
修改纹理参数查看效果:
    // 配置纹理参数
    gl.texParameteri(gl.TEXTURE_2D, gl.TEXTURE_MIN_FILTER, gl.LINEAR);
    gl.texParameteri(gl.TEXTURE_2D, gl.TEXTURE_WRAP_S, gl.CLAMP_TO_EDGE);
    gl.texParameteri(gl.TEXTURE_2D, gl.TEXTURE_WRAP_T, gl.MIRRORED_REPEAT);
